How To Build a Mini Picnic Table Squirrel Feeder
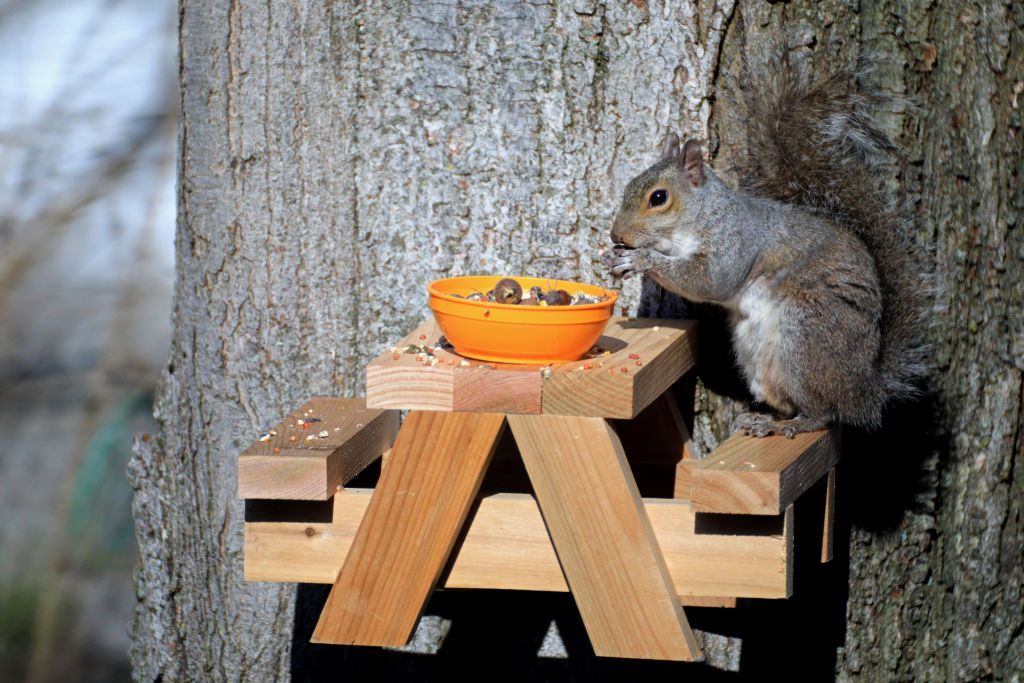
I’ve been receiving lots of nice comments about the squirrel picnic table I made, so I thought I’d share the details here in case someone else wants to make one too.
*Note: I’ve noticed some people sharing photos of tables they made using my tutorial without giving credit, and that makes me a bit sad. It would mean a lot to me if you could share a link back to my tutorial if you decide to use it. Thanks a bunch!*
To clarify, the idea for this table wasn’t mine originally. I saw a viral photo on Facebook of a man who made a squirrel picnic table, and friends suggested I try making one too. I thought it sounded like a fun project, so I gave it a shot. (Here’s the original link: Squirrel Picnic Table by Rick Kalinowski)
Now, onto how it went with my squirrels once I finished building it.
So, here’s a somewhat basic guide on how to build it (assuming you know a bit about woodworking). Since I sort of figured it out as I went along, I don’t have pictures of every step. But I’ll do my best to explain how I did it.
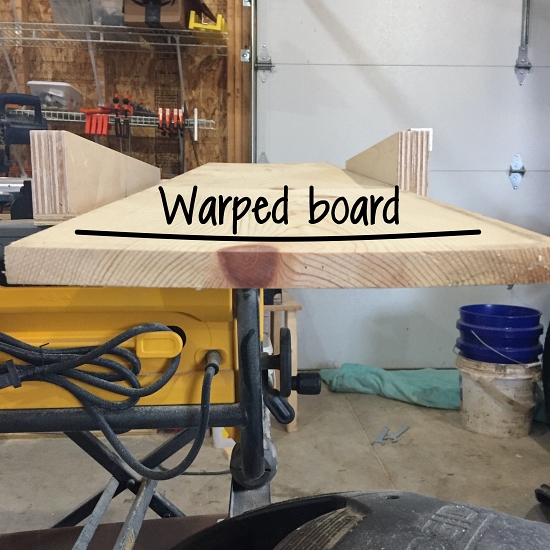
I didn’t have a lot of spare wood lying around, so I used a slightly bent board that was 1 inch thick, 12 inches wide, and 6 feet long. I trimmed it down to the sizes I needed with my table saw and smoothed out the edges of each piece with a router. But you can really use any scrap wood you have lying around for this project!
I aimed for a “rustic” style with my table—I wanted it to look more detailed and lifelike than the original viral photo. I enjoy woodworking, so I took my time to make it unique, rather than just copying the original.
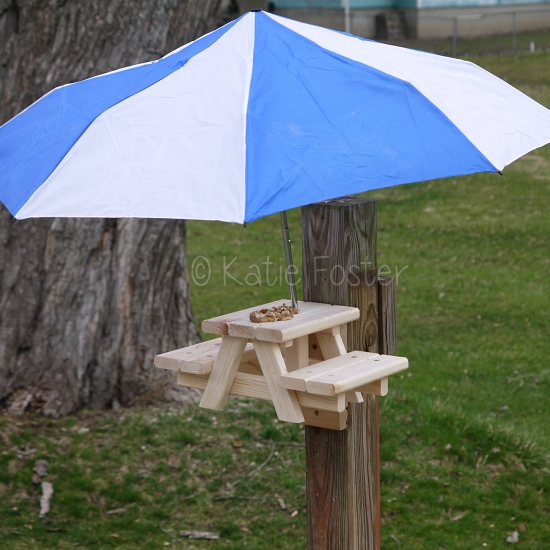
Even though I spent a lot of time taking pieces apart and putting them back together, I finally finished it, and it’s actually quite simple to make! I tried adding an umbrella, but it didn’t seem to please my squirrels much, haha.
Here, I’ll explain how I made the table, and you can decide how you want to hang it. (I attached a block of wood to one end of the table and screwed it into a post on my deck.)
First, here are the final measurements I used for the warped board. These are the actual sizes, not the typical sizes you might find in stores. (Apart from the wood, I used exterior screws that were 1-1/4 inches long.)
Seat tops (4): 2 inches wide, 3/4 inch thick, 8 inches long
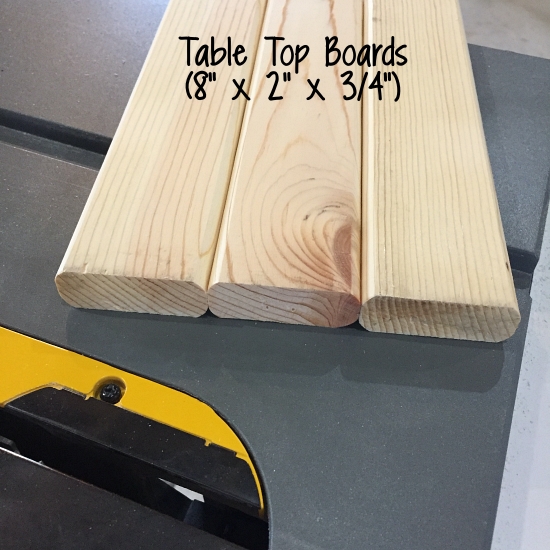
Table top (3): 2 inches wide, 3/4 inch thick, 8 inches long
Legs (4): I’ll explain this below, as I cut them at an angle; but the boards were 1.5 inches wide, 3/4 inch thick, and 5 inches long (before I angled them on the miter saw)
Supports for table top (2): 3/4 inch wide, 3/4 inch thick, 5 inches long
Supports for seats (2): 1.5 inches wide, 3/4 inch thick, 12 inches long
(In the photo below, the dimensions are slightly different from the final ones—I adjusted them a bit as I worked, but this shows the pieces I cut.)
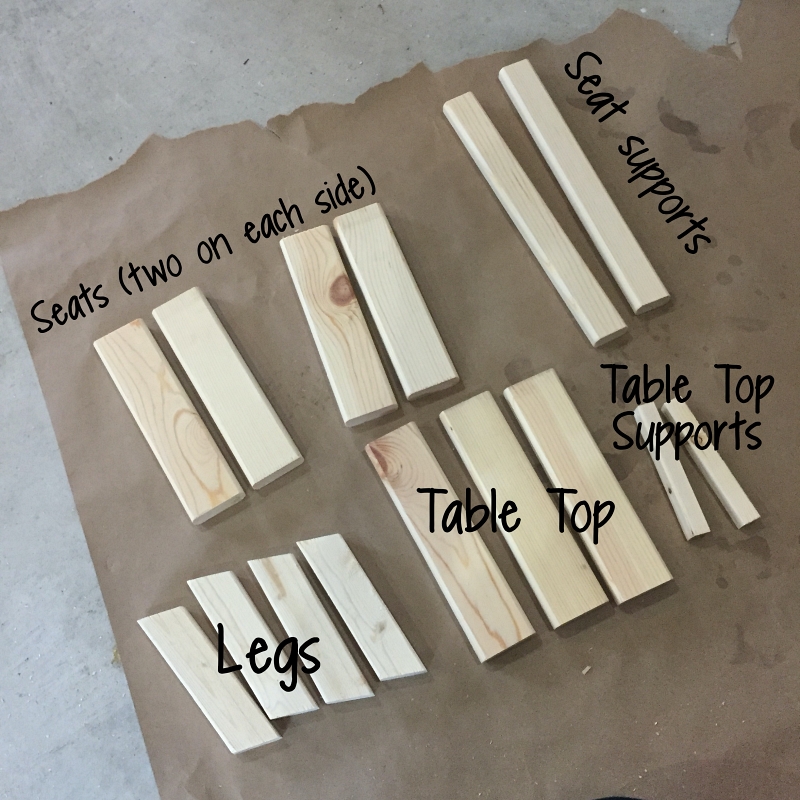
To start, I used the table saw to cut out all the boards. At first, I considered just putting them together as they were. But when I imagine picnic tables, I think of the edges of the boards being a bit rounded for a more rustic look. So, I used the router with a rounding bit to trim the edges along the length of the boards.
When it came to cutting the legs, I wasn’t sure what angle to use. I just estimated it, and then I saw that it was close to a number on my miter saw, which was highlighted at 22.5 degrees. I don’t know why that number is significant for mitering, but I thought I’d give it a shot. And surprisingly, it worked out really well!
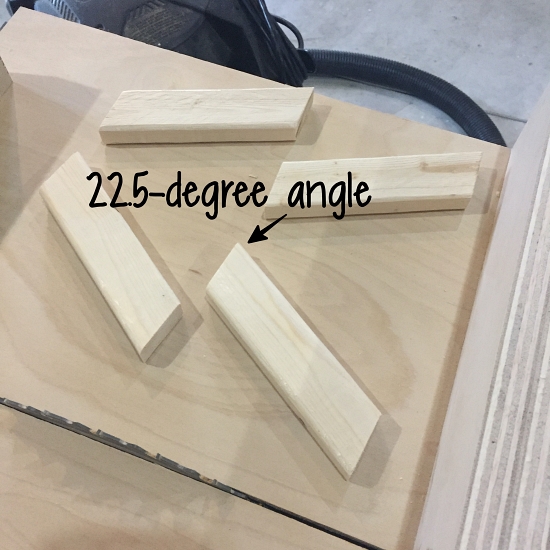
After rounding the leg pieces with the router (each about 6 inches long), I cut each side at a 22.5-degree angle using the miter saw, making them into parallelograms. Once angled, they measured 5 inches from the top edge straight down to the bottom edge.
To put it all together:
(There must be an easier way to assemble than what I did because it was tough to drill in such a small area. I had to use a drill bit that allowed me to drill at a right angle. But here’s what I did…)
I laid the three table top pieces next to each other, and then I placed the two tabletop support pieces on top of those, perpendicular to the tabletop pieces.
I positioned the table top support pieces 2 inches in from the edge of the boards and screwed them down to the bottom of the table top. (Yes, they look messy, but they were just scraps and hidden from the outside of the table).
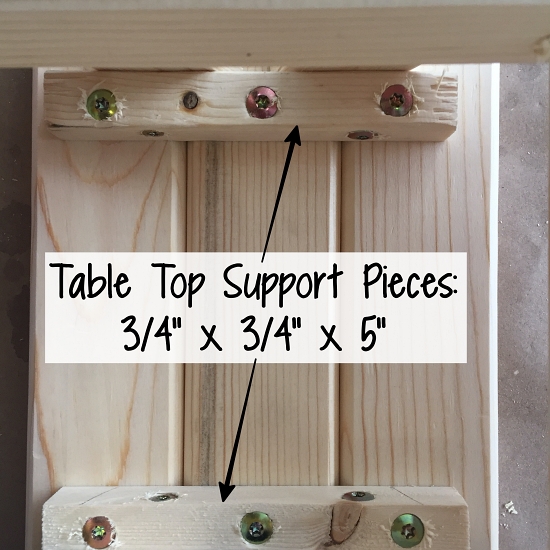
Next, I positioned the legs on the outer side of the support boards (about 1/4 inch apart in the center) and screwed them into place from behind.
You can see from the side—this is how I arranged it to visualize how I wanted it to look. (Of course, the gap between the top of the legs in the picture is larger than 1/4 inch, but it was just a rough idea as I worked. After assembly, there is indeed a 1/4-inch gap there. The dimensions below are the final measurements once I finished).
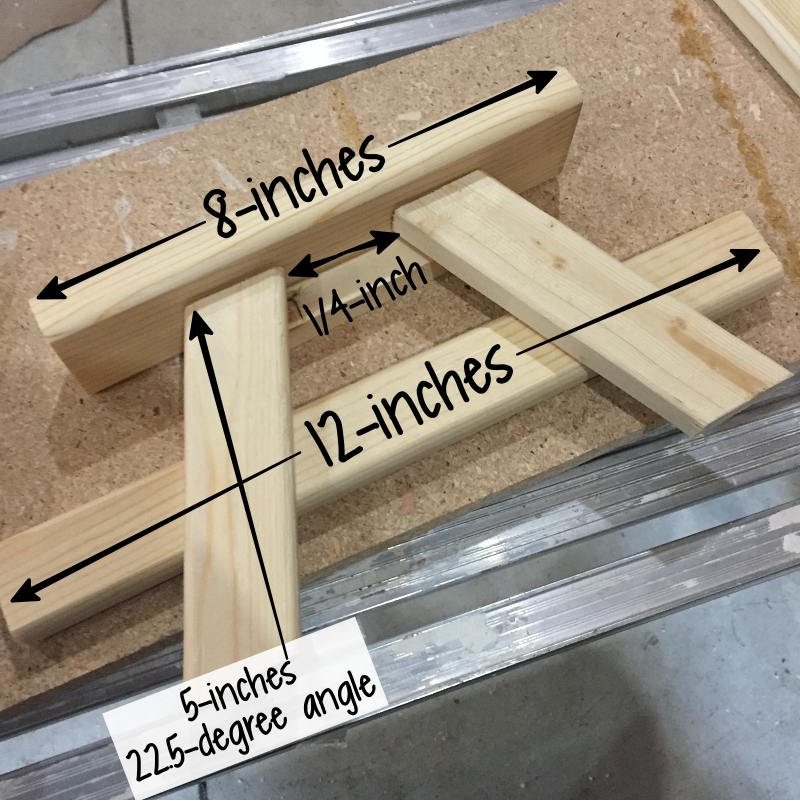
When you examine the side of the “A” frame when everything is assembled, the distance from the bottom of the middle tabletop board to the top of the seat support is 2-5/8 inches. (Updated: There was a mistake here, I’ve fixed it)
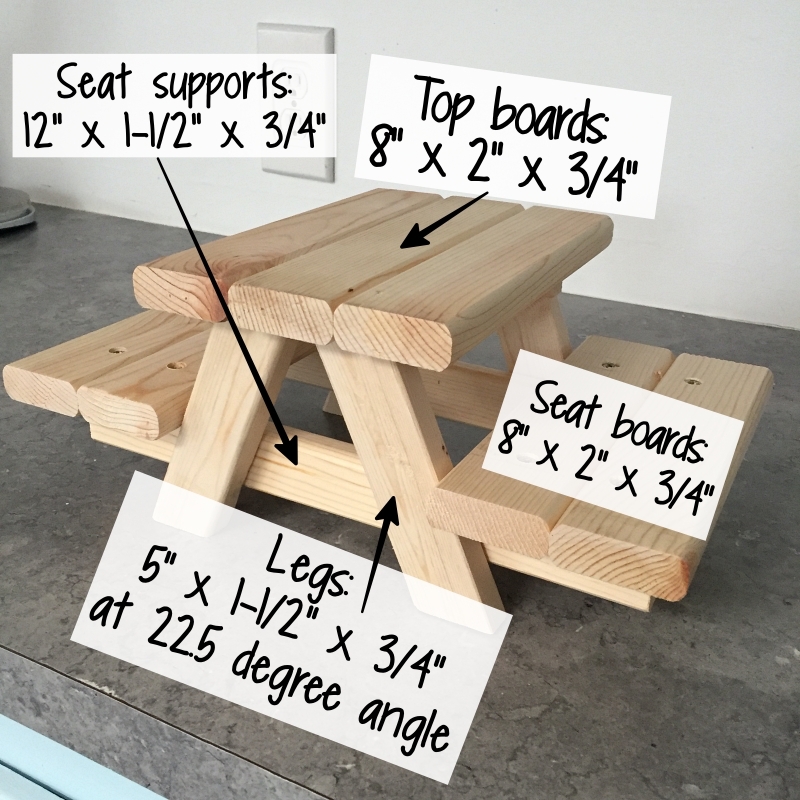
Once the legs were secured, I attached the seat support boards by screwing them into the legs from behind.
Then, I placed the seat boards on top of the seat supports and screwed them down into the supports from above.
As I’ve shown, explaining this isn’t simple, but the pictures should help. The exact measurements aren’t crucial, so feel free to adjust them until it looks right to you. Essentially, I just kept adjusting until I was happy with how it looked.
And here’s the finished product… (I mentioned adding an umbrella, but if I were to make it again, I’d skip that).
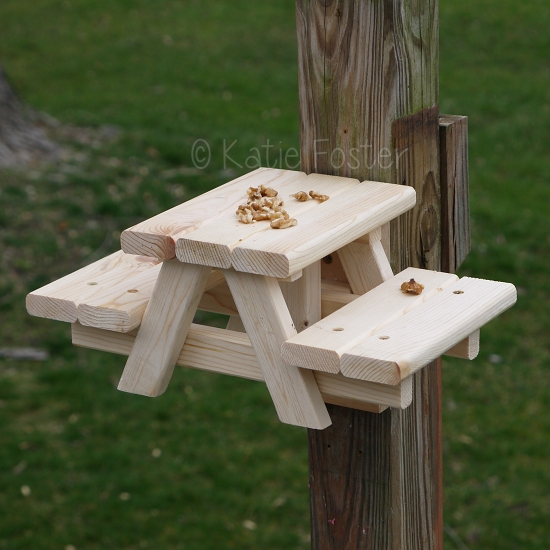
Be sure to read the post about how my squirrels reacted to it… I put in a lot of effort for them! *eye roll* Haha…
